Fill in and track forms
The Forms section
The Forms section of the menu has four tabs:
| Tab | Content | For whom |
|---|---|---|
| To fill in | The forms not yet sent, by due date. | Everyone |
| Sent | The forms that have been sent, most recent first, with their report. | Everyone |
| Inspections | The inspections that have been started: see Inspections. | Prepare level |
| Templates | The form and inspection templates: see Templates. | Prepare level |
Each member sees the forms assigned to them and the ones they created. With the View all level, they see all the forms of the project.
To fill in
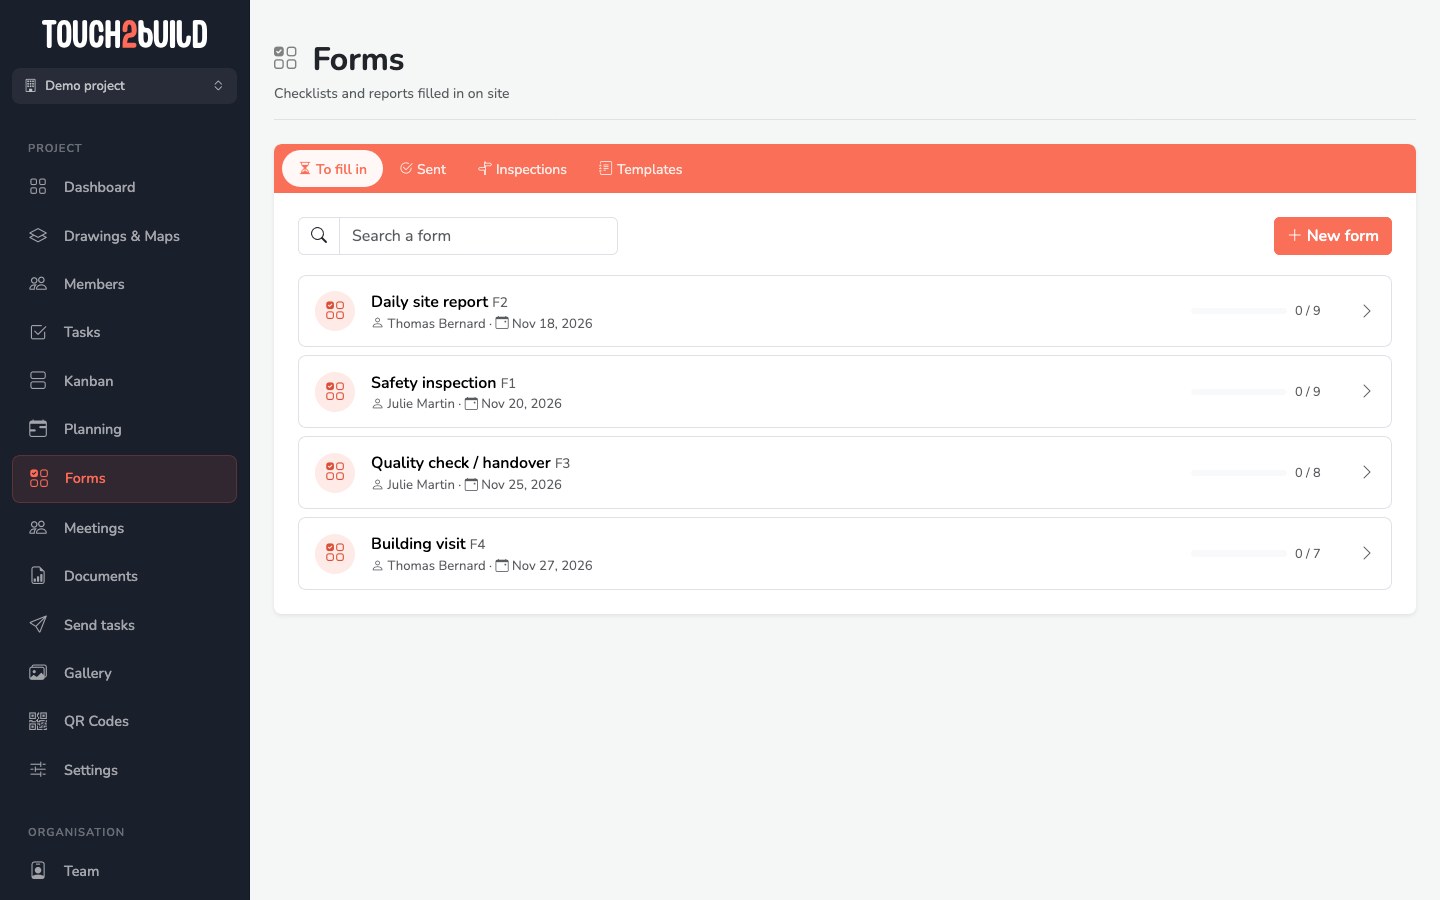
Each line shows the name of the form and its number, the person who has to fill it in and the due date. The red late badge marks a due date that has passed. On the right, the bar shows the progress: questions answered out of the total.
The search covers the name, the template and the assignee.
Sent
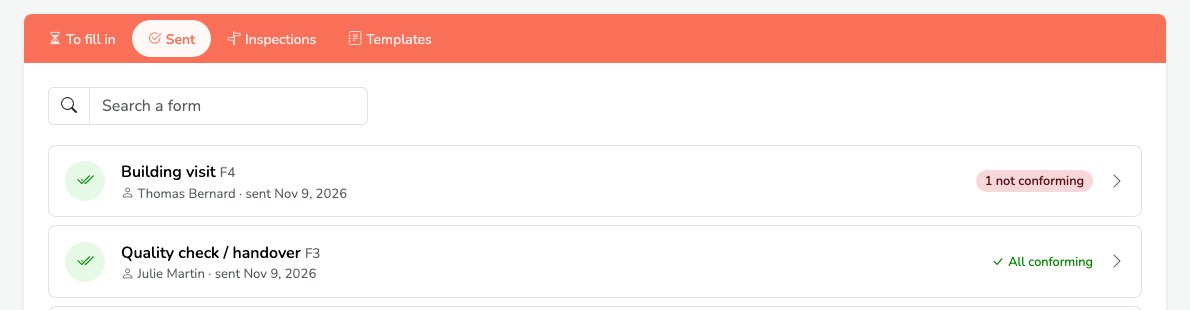
Each line shows the date sent and the result: All conforming in green, or the number of not conforming answers in red.
Create a form
You need the Prepare level.
- In the To fill in tab, click New form.
-
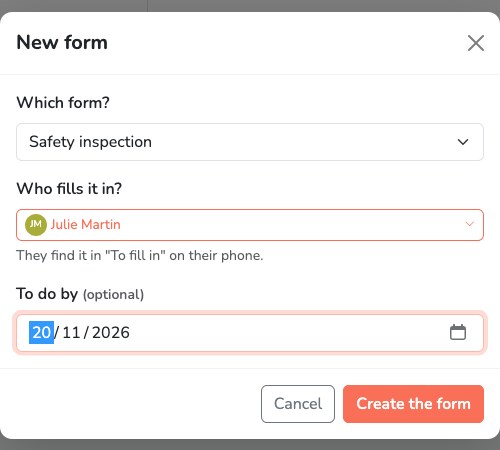
Choose the template, the person who fills it in and, if needed, the due date:
-
Click Create the form. It opens straight away.
The assignee finds it in To fill in, on the web and on their phone.
Place a form on a drawing
A form can be attached to a precise spot: a room to accept, a scaffold to check and so on.
- Open the drawing.
- At the bottom left, in Creation mode, choose Forms.
- Long press at the spot you want: the New form window opens, with that location.
The forms to fill in appear on the drawing with a purple clipboard marker, numbered F1, F2 and so on. Click one to open the form. The layers button at the bottom left shows or hides Forms to fill in.
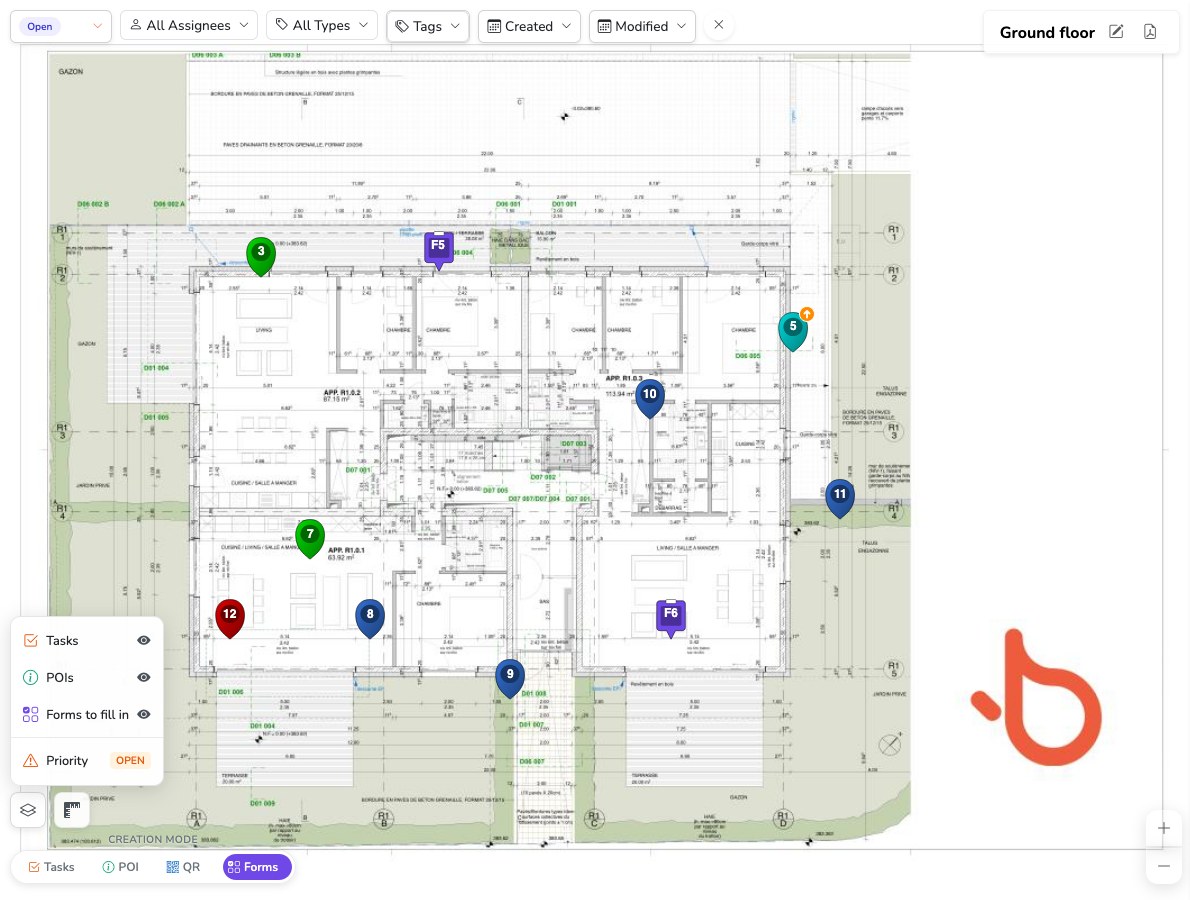
Sent forms are no longer shown on the drawing. The task filters do not apply to forms.
No editing, no deleting
Once created, a form cannot be reassigned, moved or given another due date. If you made a mistake, leave it aside and create another one.
Fill in a form
The form is most often filled in on site, with the mobile app. It can also be filled in on the web, by the assignee or by a person in charge at the Prepare level.
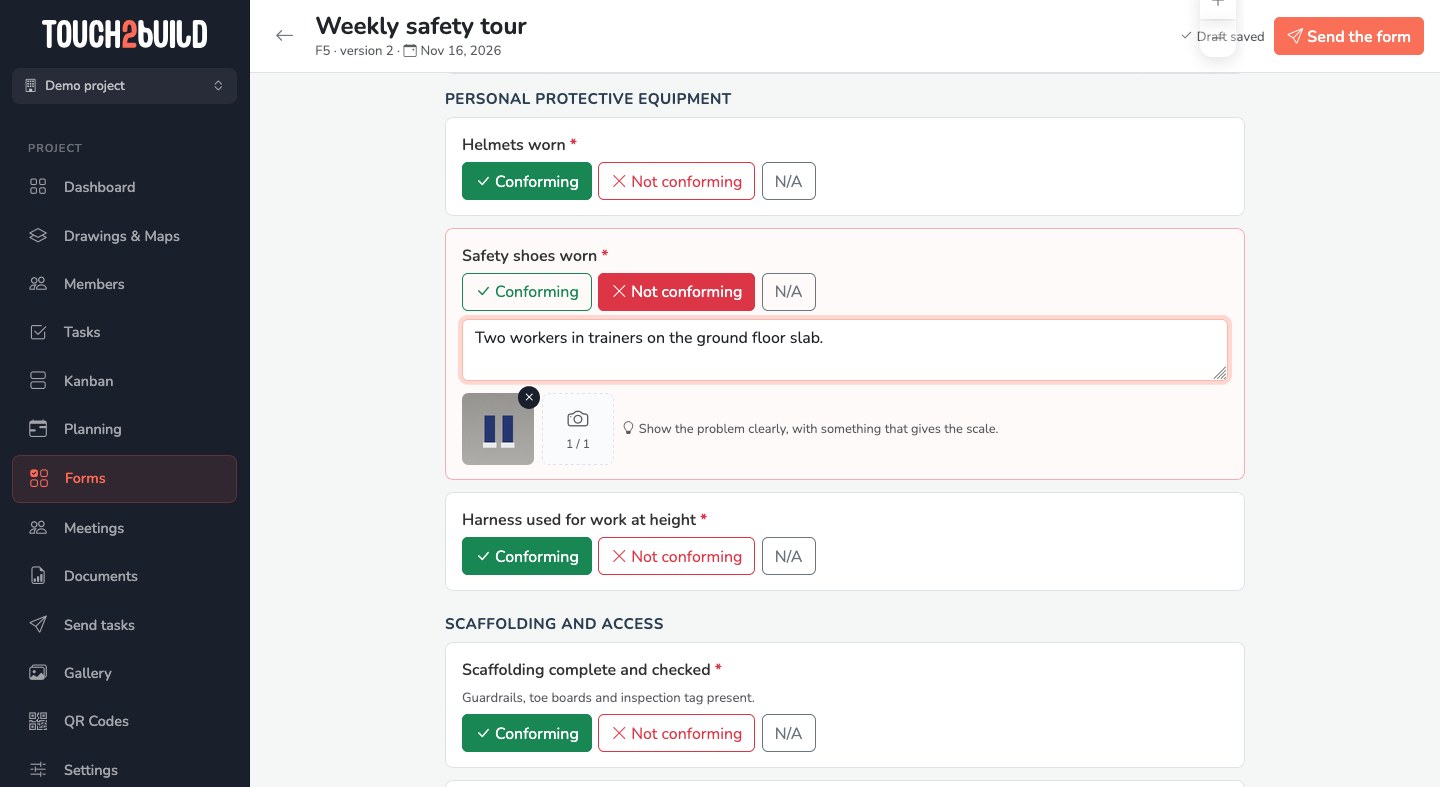
- The top of the page shows the number, the template and its version, the assignee and the due date. If the form is placed on a drawing, an extract of the drawing shows the location; See on the plan opens the drawing.
- Required questions are marked with a red asterisk.
- Answers are saved automatically as you type: Draft saved shows at the top. You can leave and come back later.
- A Not conforming answer opens a comment field and, depending on the template, asks for photos. The light bulb recalls the shooting instructions.
- On the web, you pick the photos from the files of your computer.
- You draw a signature with the mouse: Sign here, then Use this signature.
Send the form
Click Send the form, at the top or the bottom of the page.
- Touch2build checks the answers. If some are missing, Some answers are missing shows and each question to complete is marked: required answer, non-conformity comment, photos to take, table rows and so on.
-
If some answers are not conforming, a window offers to create a task for each one:
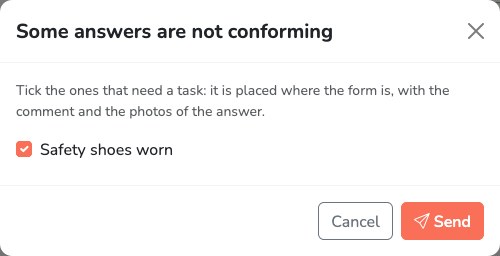
The boxes are ticked for the questions that offer a task in the template. Untick those that need no follow-up.
-
Click Send.
The form is then locked: its answers and photos can no longer be changed.
The tasks created
Each ticked non-conformity becomes a task:
- title: the question, preceded by the title of its section, for example "Personal protective equipment — Safety shoes worn";
- description: the comment typed on site;
- location: that of the form on the drawing;
- type: the one chosen in the template;
- photos: those taken for the question.
The task is assigned to the default assignee of the project or, failing that, to the person who sent the form. It is then followed like any task: reassignment, resolution, reports and so on.
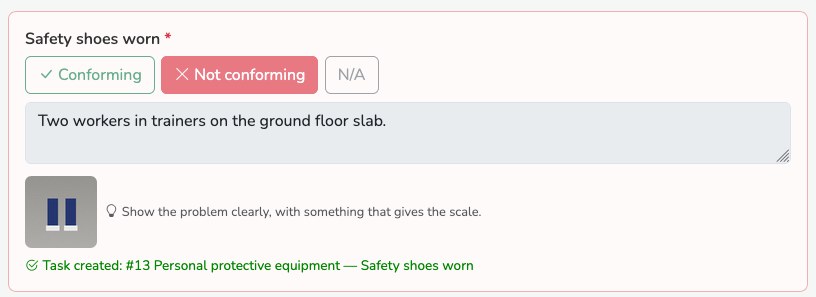
In the sent form, the question shows Task created with a link to the task:
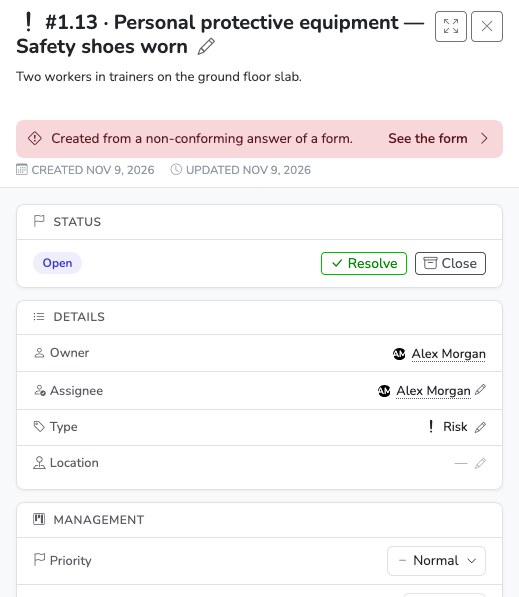
In the task detail, a banner recalls where it comes from; See the form opens the form:
Create the task later
A non-conformity left without a task shows the Create a task button in the sent form. A person in charge at the Prepare level can use it at any time, on the web. One question never creates two tasks.
The sent form
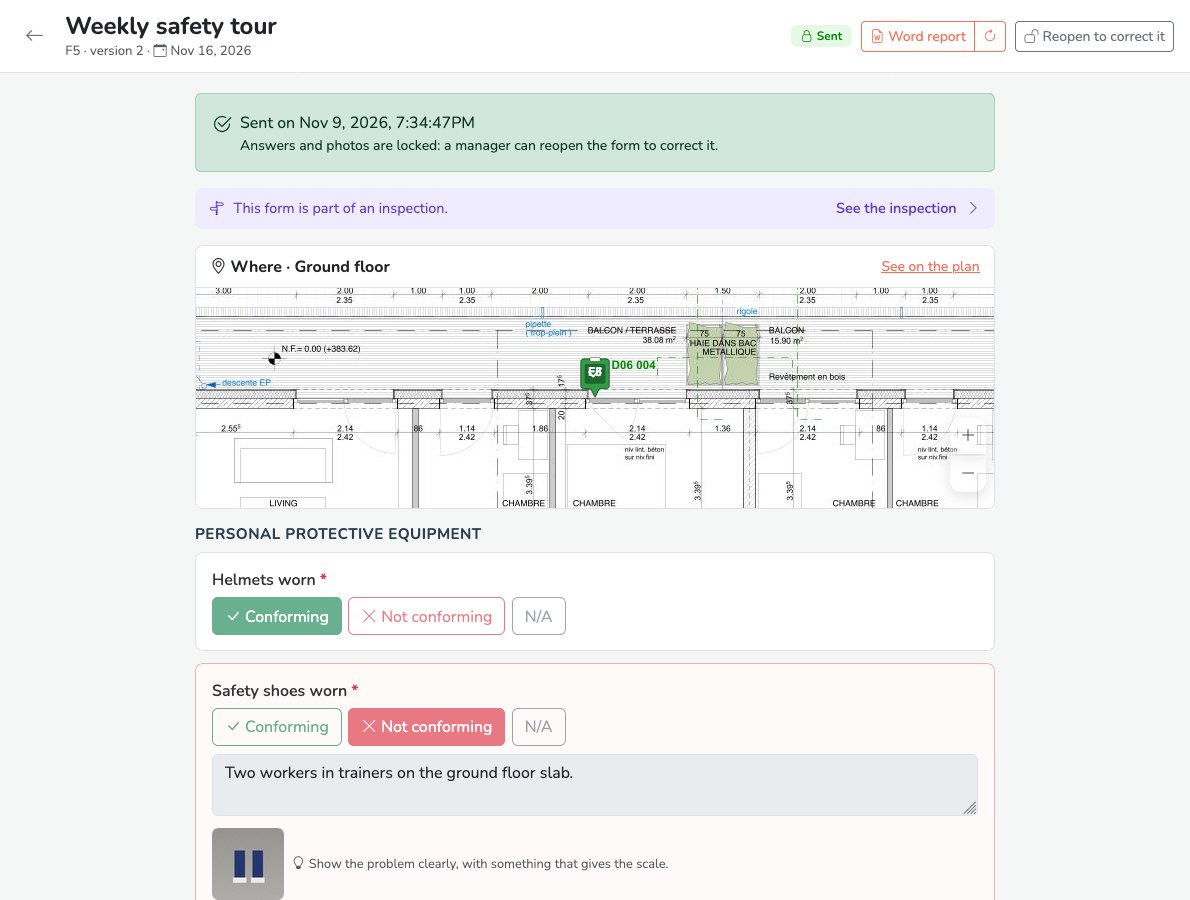
- The green banner shows the date sent and recalls that the answers are locked.
- Word report downloads the report. The circular arrow next to it makes it again.
- Reopen to correct it (Prepare level) puts the form back into editing: a yellow banner shows it. The assignee corrects it and sends it again. The tasks already created are not duplicated.
The Word report
The report of a form contains the header (project, template and version, person who filled it in, date sent), an extract of the drawing with the location, all the answers with their photos and signatures, and the list of non-conformities with the tasks created.
It is produced automatically when the form is sent if the template has the Generate the Word report when the form is sent option, which is on by default. For a form that belongs to an inspection, the report of the whole inspection is produced instead, when it is closed.
Otherwise, click Make the Word report in the sent form. While it is being prepared, the button shows Preparing the Word report…, then Word report when it is ready.
Like the other exports, the report also arrives in the Documents section of the person who started its production. For a form sent from mobile, that is the person who filled in the form. The Word report button of the form, for its part, is available to everyone who can see the form.