Drawings and maps
The tasks of a project are always placed at a precise spot. The person on site knows where to go without a long description, and the reports show where each problem is.
This support can be of two types:
- Drawing
- A PDF drawing of the building: floor plan, section, elevation… This is the most common case for a building site.
- Map
- A geographic map, for example a topographic map or an aerial view. It is useful when there is no drawing, or for large sites: roads, utilities, landscaping, housing developments, paths…
The Drawings & Maps section gathers all the supports of the project.
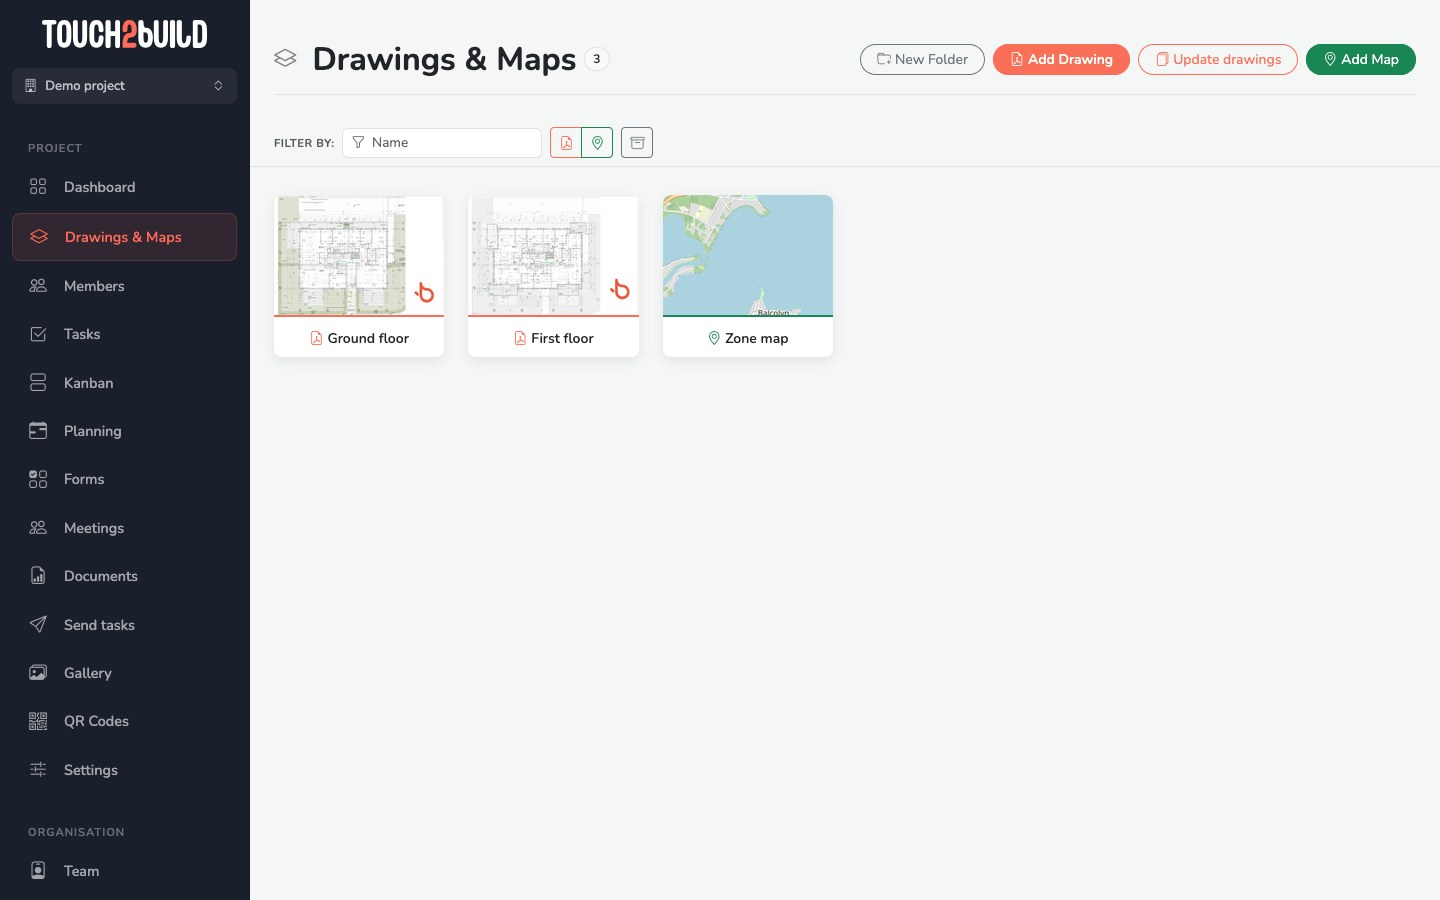
At the top of the page:
- New folder: sorts drawings and maps into folders, for example by building or by package;
- Add Drawing: imports PDF drawings;
- Add Map: creates a geographic map.
The Name field filters the thumbnails. The two buttons next to it show or hide drawings and maps. The third also shows inactive supports.
Organise with folders
Drag a thumbnail onto a folder to file it there. To go up a level, drag it onto the back thumbnail.
Add drawings
- Click Add Drawing.
-
Drop your PDF files or click Browse Files.
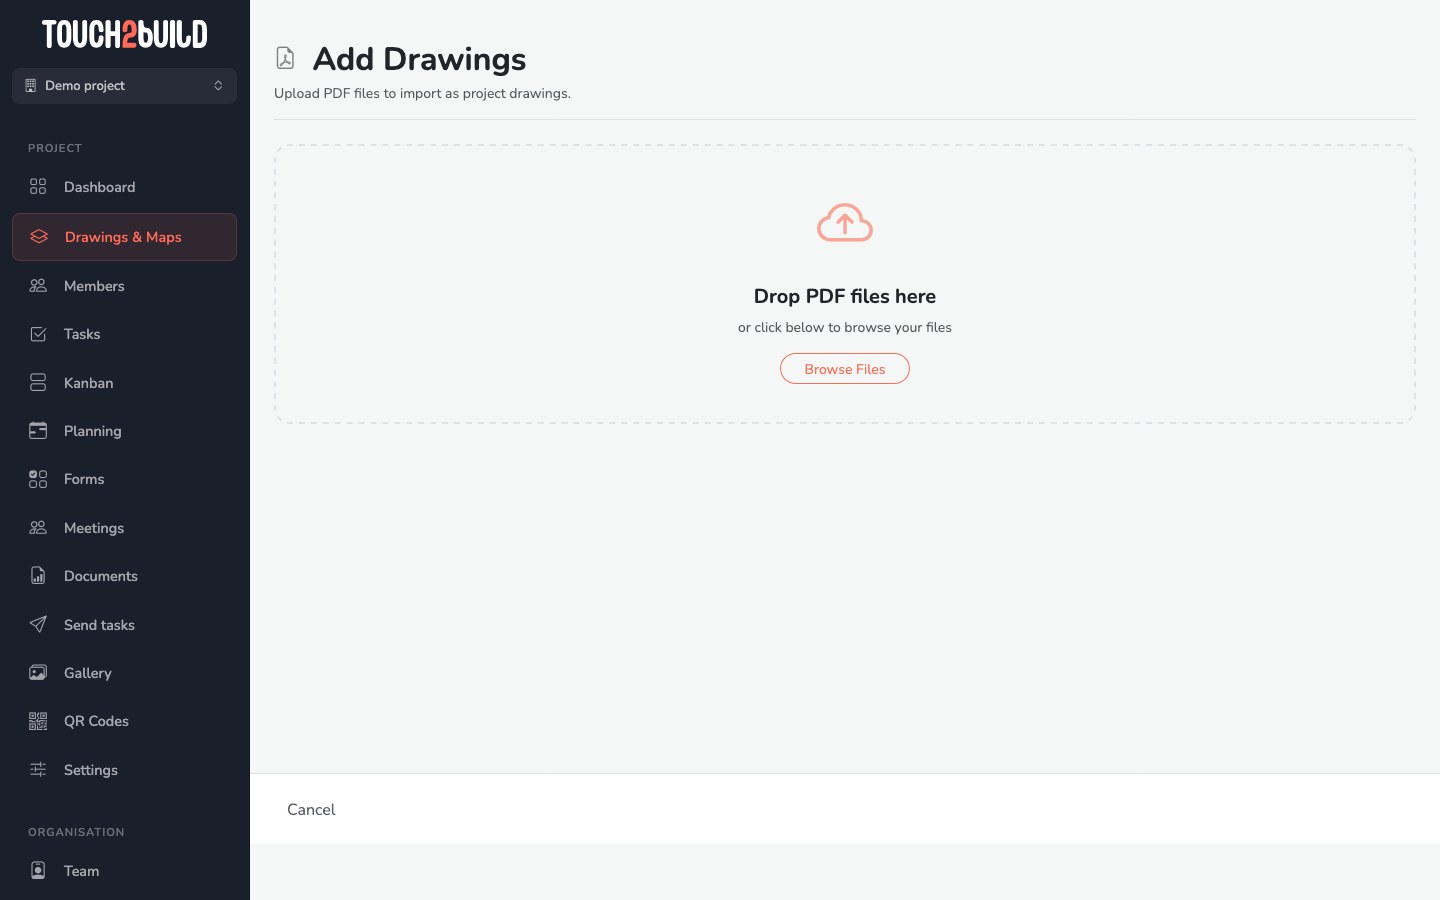
-
Each page of the PDF becomes a drawing. Untick the pages you do not need and give each drawing a name.
- Click Finalize Import.
The drawing shows Importing… while it is processed, then becomes available.
Update a drawing
When the architect issues a new revision, do not create a new drawing. Open the Details of the drawing and use Replace file. Tasks already placed stay on the drawing, previous versions are kept and Touch2build shows you what changed. See Drawing versions.
Add a map
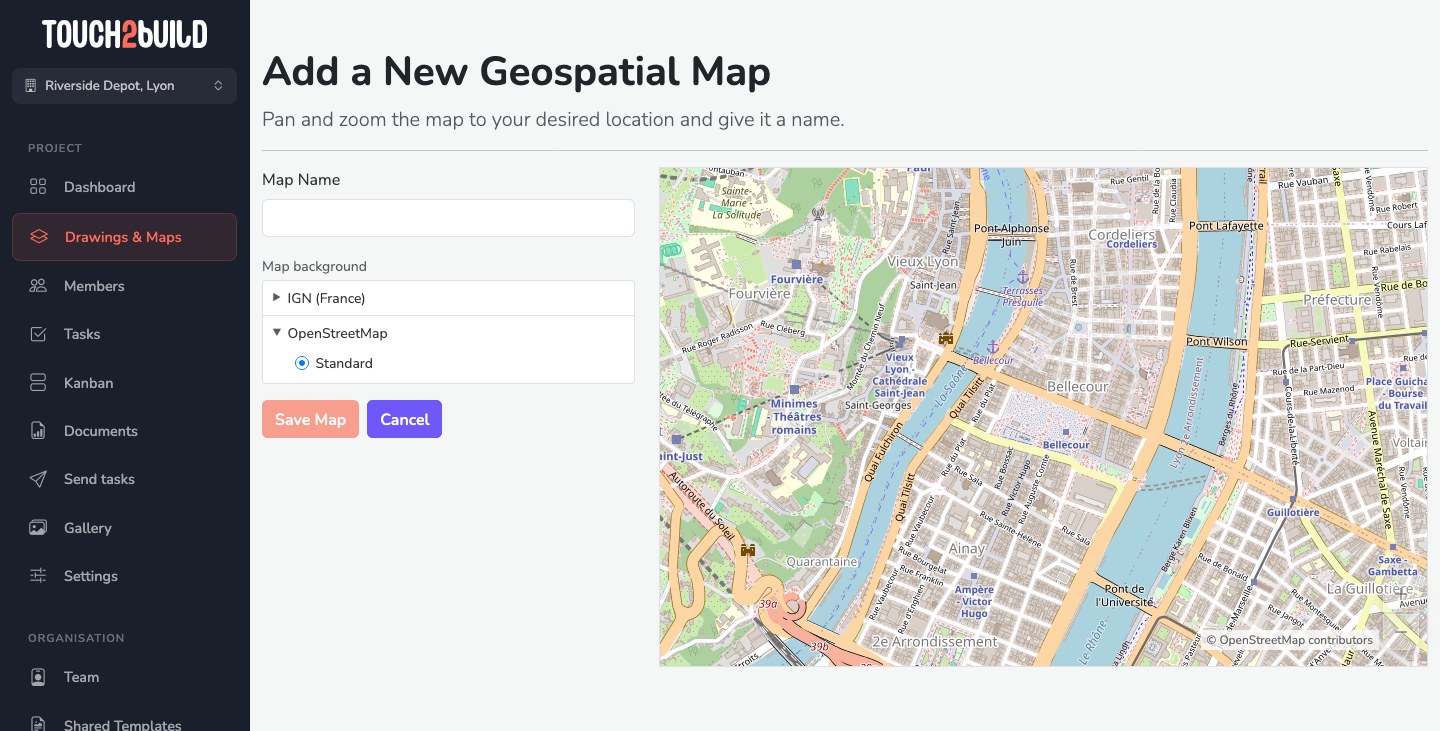
- Click Add Map.
- Move and zoom the map to the site area.
- Enter the Map Name.
- Choose the Map background (see below).
- Click Save Map.
Choose the base map
The base map is the image on which the tasks are placed. Official national base maps are often more precise than a general one: plot boundaries, buildings, roads, relief.
Touch2build automatically offers the base maps available where the map is centred. A national base map only appears if the site is within its area.
| Area | Provider | Base maps offered |
|---|---|---|
| Worldwide | OpenStreetMap | Standard: the default base map. |
| France, including La Réunion, Guadeloupe, Martinique, French Guiana and Mayotte | IGN | Plan IGN v2: detailed topographic map, with relief, paths and buildings. Aerial photographs: view from above, to check existing conditions. |
| Belgium: Wallonia | SPW | PICC: the base map of Wallonia, with buildings, roads and plots. |
| Belgium: Brussels | BruGIS | Urbis plan, in colour or in grey. |
| Belgium: Flanders | Digitaal Vlaanderen | GRB-basiskaart, in colour or in grey. |
| Switzerland | swisstopo | Pixelkarte: the national map in colour. SwissImage: aerial photographs. |
| Luxembourg | Géoportail Luxembourg | Topographic map. |
Grey base map
Grey base maps make the task pins stand out, in the colour of their state.
The base maps are listed under Map background on the Add a New Geospatial Map page. On an account without access to a national base map for the site, only OpenStreetMap Standard is offered. In the Details panel, Adjust position moves the map; the Background row shows the base map in use.
Details of a drawing or map
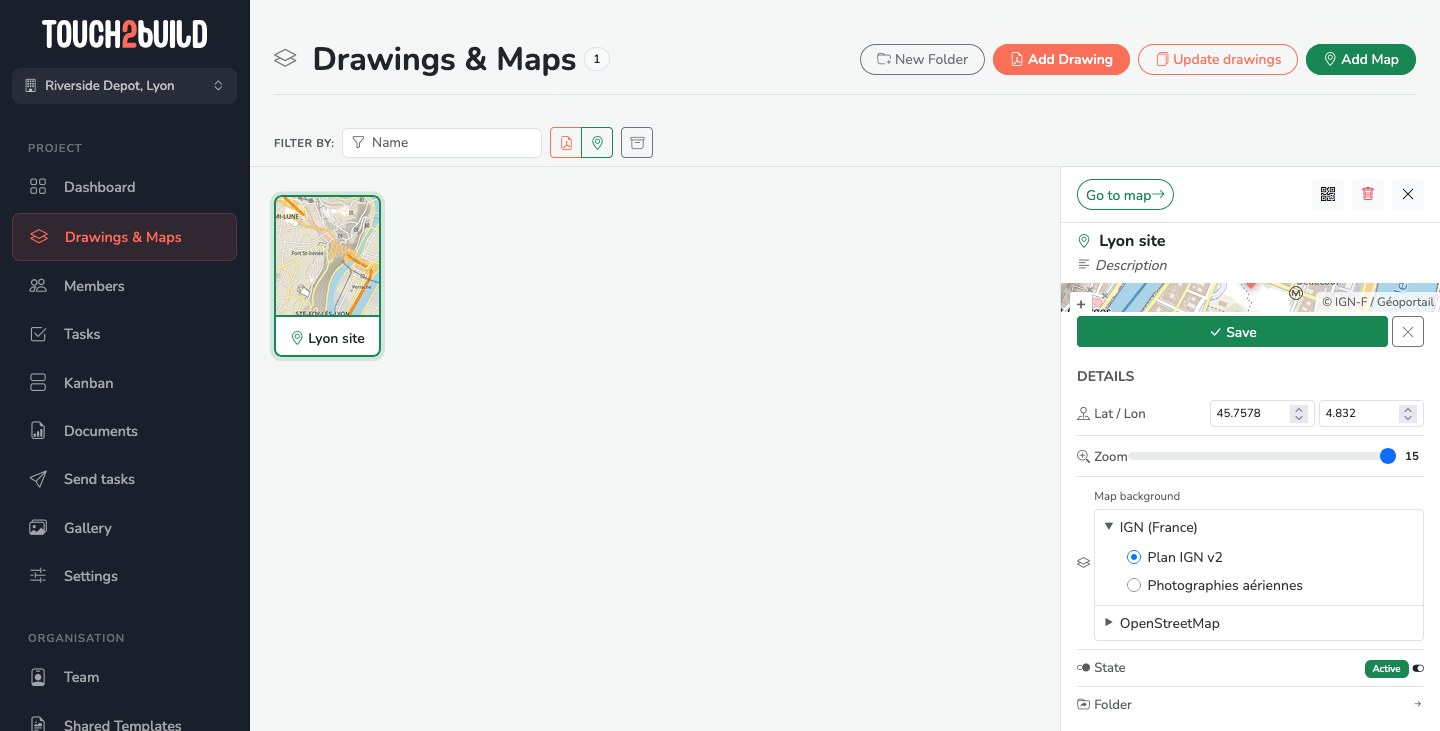
Click the Details button on a thumbnail to open the details panel.
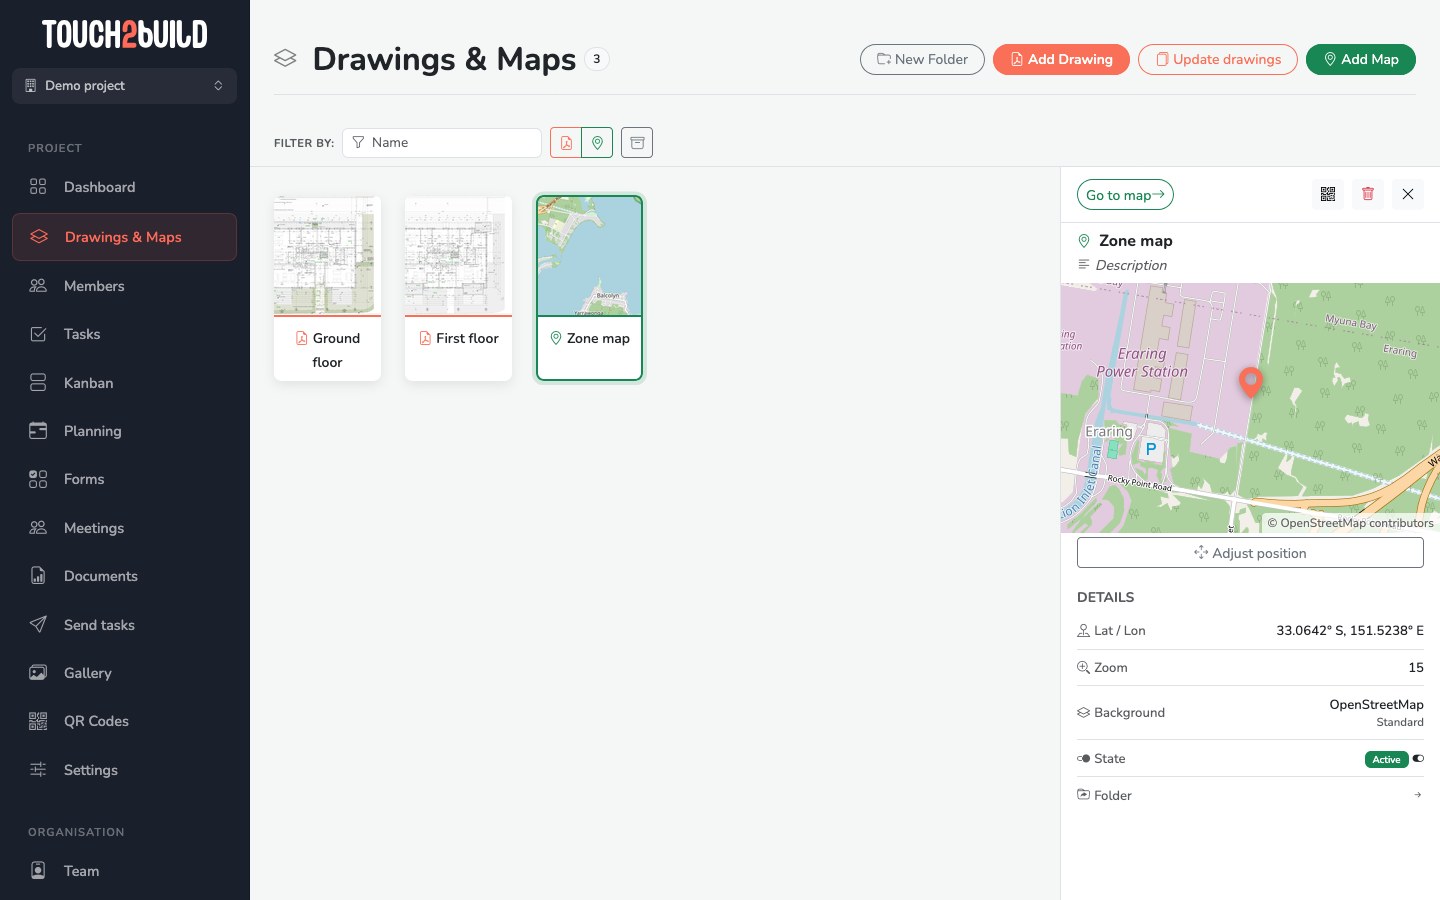
The panel lets you:
- open the support with Go to drawing or Go to map;
- for a drawing, open its full page with the full screen button, to see and compare its versions;
- edit the name and the description;
- for a drawing, fill in Zone, Level, Discipline and Doc number, and Replace file;
- for a drawing, see its Scale, used to measure on the drawing (drawing administrators);
- for a map, Adjust position and change the base map;
- set the Status to Inactive: the support is hidden without being deleted;
- generate a QR code to display on site, or delete the support.
View a drawing or map
Click a thumbnail to open the drawing or map full screen. Tasks appear as numbered pins, in the colour of their state.
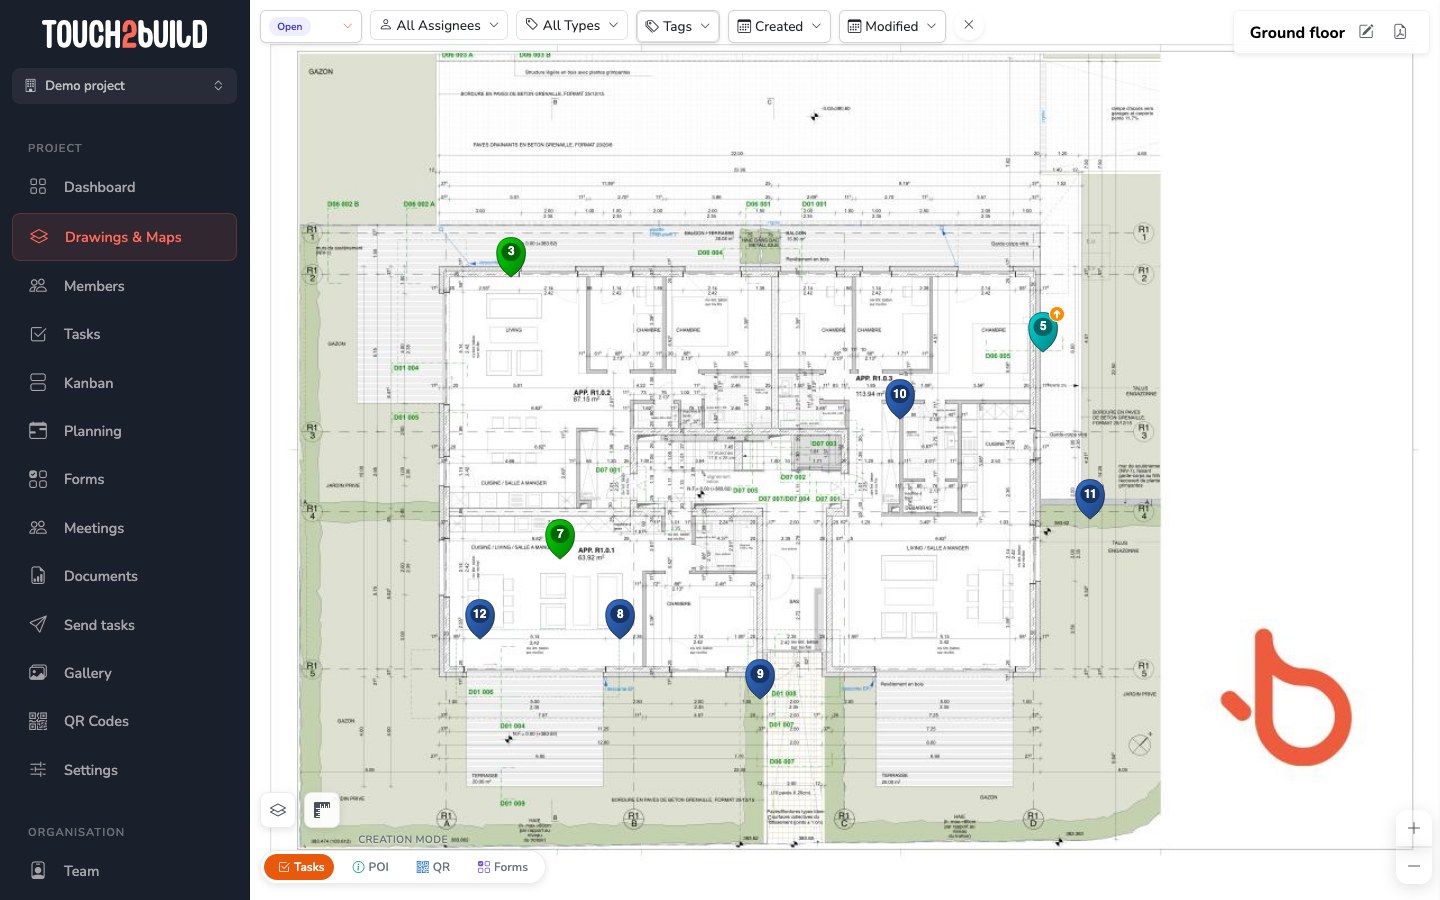
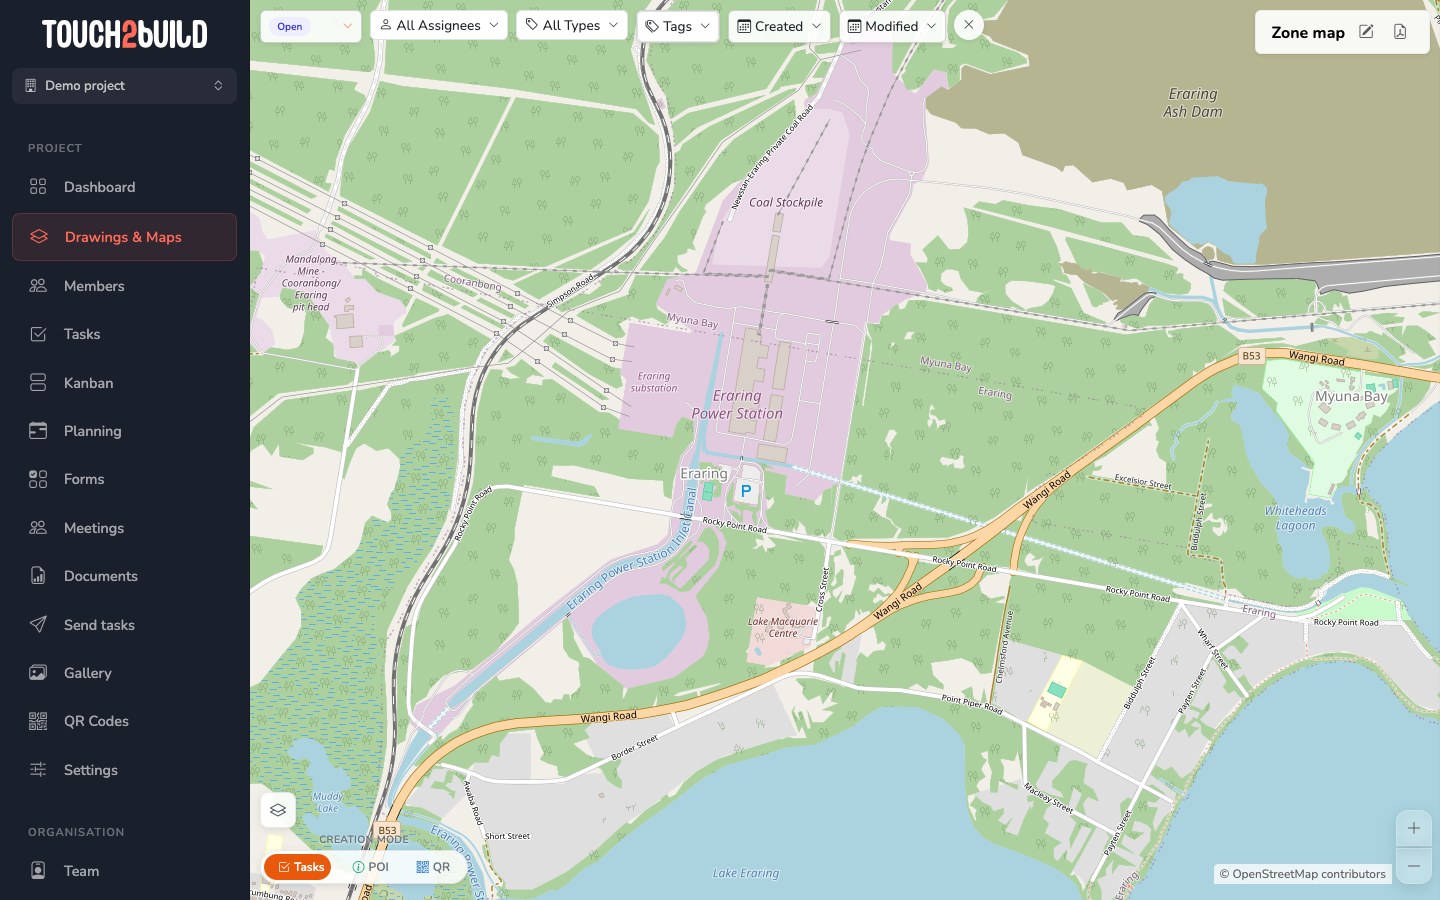
- Mouse wheel or + / − buttons: zoom.
- Click and drag: pan.
- Filter bar at the top: show only some tasks by state, assignee, type, tags or dates.
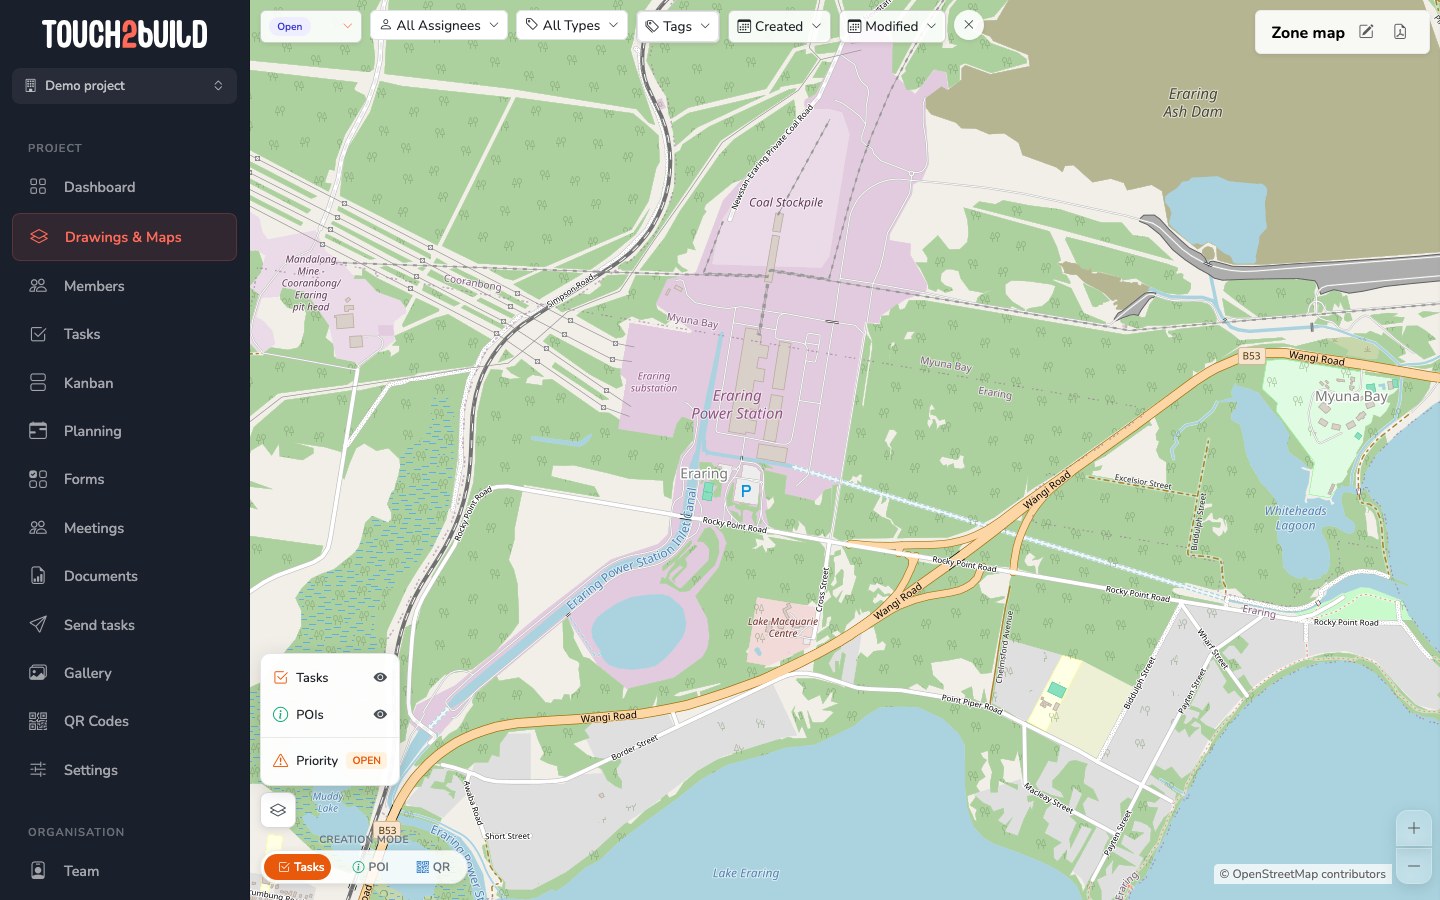
-
Layers button at the bottom left: show or hide Tasks and POIs, and set how Priority is displayed.
-
Click a pin: opens the task detail on the right.
To create a task on the drawing, long-press at the spot: see Create a task on a drawing.